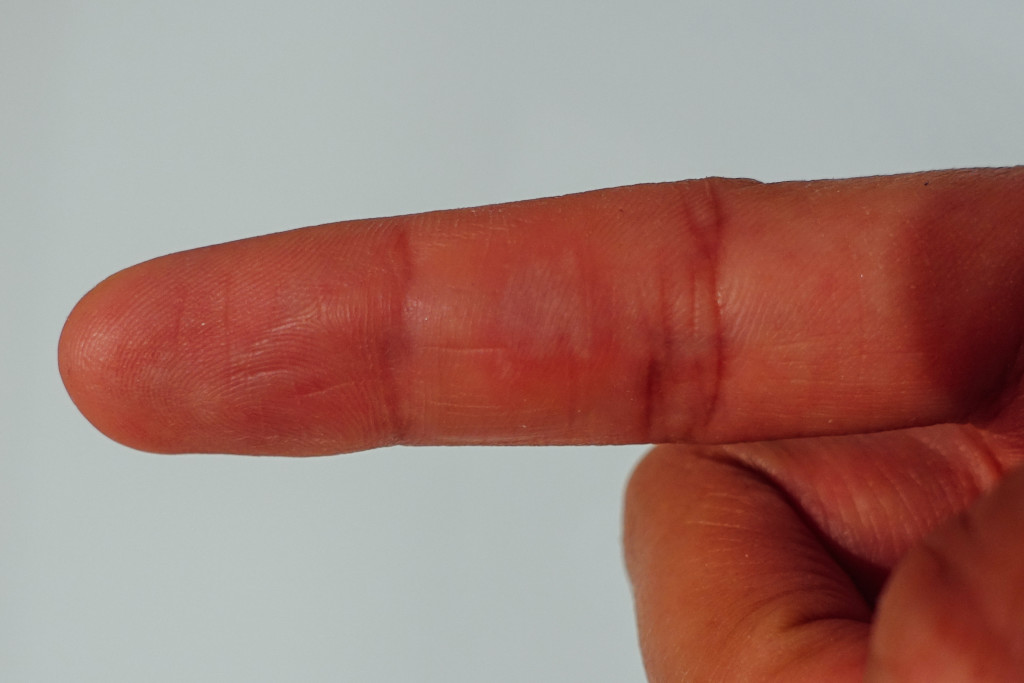
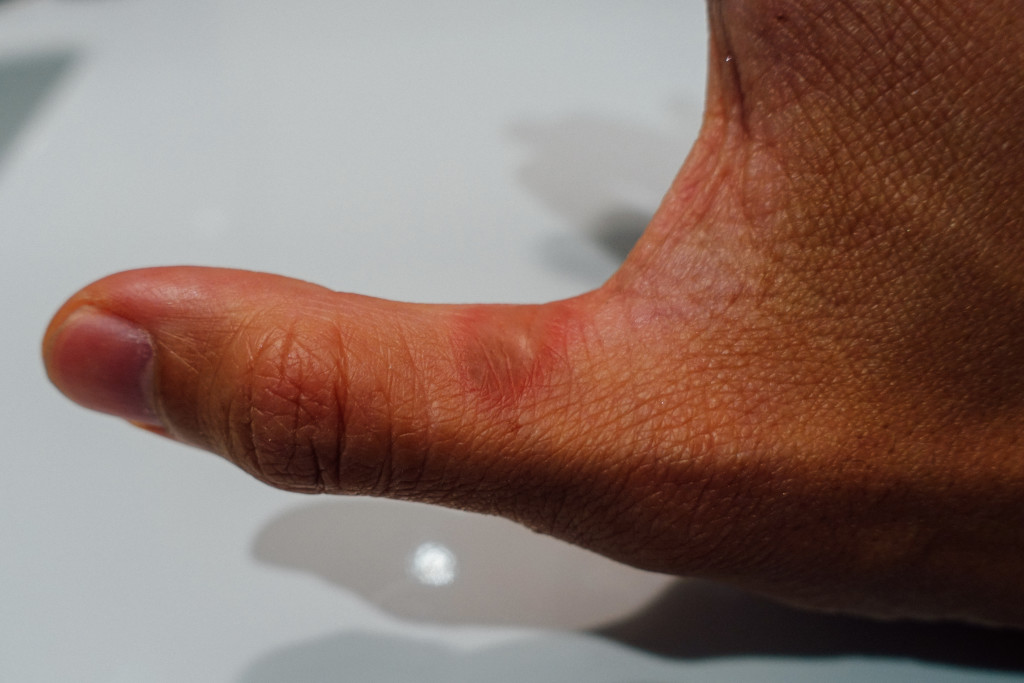
Bad News: I BURNED MY HAND 😭😭😭… I’ll describe my mistake below — hopefully this helps others avoid doing the same thing. Painful!
Good News: I made some good chicken! Aww yeah. The pan-to-oven method was a success. I didn’t keep track of time (forgot to pause the stopwatch when I burned myself), but my cost per serving was $2.02.
The Recipe
I found a recipe for Pan Roasted Chicken on Serious Eats. Shout out to J. KENJI LÓPEZ-ALT who wrote (at least) 6 variations of this recipe! He knows what he’s doing:
- Pan-Roasted Chicken w/Vegetables and Dijon Jus
- Pan-Roasted Chicken Breasts w/Bourbon-Mustard Pan Sauce
- Pan-Roasted Chicken Breasts w/Lemon and Rosemary Pan Sauce
- Pan-Roasted Chicken Breasts w/Morel Mushroom Pan Sauce
- Pan-Roasted Chicken Breasts w/White Wine and Fines Herbes Pan Sauce
- Why Chicken With Pan Sauce Is Always Better at Restaurants (and How to Make Yours Just as Good at Home)
This is exactly the type of versatile dish I want to learn.
I made #3 and incorporated some of his tips from #6. I also rewrote the steps to be a little easier to follow…
Ingredients
- 2 boneless skin-on chicken breasts (I had already bought enough chicken thighs for a week, so I used these)
- Kosher salt and freshly ground black pepper
- 1 tablespoon canola oil
- 1 cup homemade or store-bought low-sodium chicken stock
- 1 small shallot, minced (I used onions & garlic instead)
- 1 tablespoon minced fresh rosemary leaves (I used dried rosemary instead)
- 1 piece of peeled lemon zest plus 1-1/2 tablespoons of fresh lemon juice
- 2 tablespoons unsalted butter
- 1 tablespoon corn starch
- 2 teaspoons soy sauce
Instructions
1. Adjust oven rack to center position and preheat oven to 450°F (232°C).
2. Pat chicken dry and season generously with salt and pepper.
3. Heat oil in an oven-safe medium stainless steel skillet over high heat until just starting to smoke.
4. Carefully lay chicken breasts into hot skillet skin side down. Cook without moving until the skin is deep golden brown and very crisp, about 6 minutes. Carefully flip chicken and transfer skillet to the oven.
5. While the chicken roasts, add stock to a liquid measuring cup. Set aside.
6. Cook chicken until an instant-read thermometer inserted into the thickest part of the chicken breasts registers 150°F (66°C), about 7 to 12 minutes. Remove skillet from oven and transfer chicken to a cutting board. Set aside to rest while you make the pan sauce.
THIS IS WHERE I BURNED MYSELF. I used a pot holder to remove the skillet from the oven, but just a minute later — after checking the chicken temperature and removing it from the pan — I forgot that it was hot. I grabbed the handle with my bare hand. OOOOOOFFFFF. 1
7. Pour off all but 1 tablespoon of fat from the skillet and place over high heat.
8. Add garlic/onions and cook, stirring, until softened and fragrant, about 30 seconds.
9. Add chicken stock and cook, scraping up any browned bits from the bottom of the pan with a wooden spoon.
10. Continue cooking on high heat until sauce is reduced by about two-thirds, 5 to 8 minutes.
11. Stir in butter (coated in corn starch), soy sauce, and lemon juice and cook at a hard boil until emulsified, about 30 seconds. Remove from heat and set aside.
12. Slice chicken and transfer to individual serving plates. Taste sauce and season with salt and pepper. Spoon sauce over the chicken and serve immediately.
Lessons Learned / Notes for Next Time
- After cooking the chicken on the stovetop, it was sticking to the bottom of the pan. I’ll try fixing that by coating the chicken with flour before adding to the pan. Shout out to wifey for the suggestion.
- Don’t leave the chicken in the oven as long. My target temperature was 150°F (66°C), and when I followed the instructions (stove for 6 minutes, oven for 8 minutes), it came out to 175°F (78°C) degrees.
- Remember that when the pan comes out of the oven it’s going to stay HOT for few minutes 🔥🔥🔥
The next attempt is going to be better… see you then.
OTHER POSTS IN THE 100-DAY CHALLENGE SERIES
Day 1: Intro to Me & My Goal
Day 4: “Why Learn?” and My Cooking Background
Day 7: What Should I Learn to Cook FIRST?
Day 10: Pasta + Meat Sauce (Tomato Bolognese)
Day 21: Pasta + Meat Sauce (less Tomato)
Day 28: Pasta + Meat Sauce (Beef Stroganoff)
Day 35: Oven Roasted Chicken Thighs
Day 42: Pan Roasted Chicken Thighs
Day 49: Pan Roasted Chicken Thighs (coated with flour)
Day 56: Pan Roasted Chicken Breasts
Day 63: Miso Glazed Baked Salmon
Day 70: Miso Glazed Baked Salmon II
Day 77: Miso Glazed Baked Salmon III
Day 84: Final Exam
Day 95: What’s Next?
Day 100: Final Thoughts


It got worse the next day but I’ll stop the photos here.↩